
In this article, we will present a very short way on how to setup stripe payment gateway, and also setup a webhook for your new microjobs website. The stripe gateway comes with the pro version of our pricerr microjobs theme. See below a series of clarifications and how to setup the webhook.
What is stripe ?
Stripe is an online payment processor for small businesses and big enterprises. Stripe’s product offerings include processing payments for online and in-person transactions, subscription billing, sending payouts to third parties, and managing a business’s financial operations. It supports a wide range of payment methods, including credit cards, debit cards, and various alternative payment methods. Stripe is known for its ease of integration, comprehensive documentation, and developer-friendly APIs, making it popular among tech startups and online businesses looking to streamline their payment systems.
What is a webhook?
A webhook, in stripe, is a secure URL from your own website, that is called whenever an event (like a payment) happens with your stripe account. You can think of it as a notification center that always listens to when a payment succeeds in your website. Like someone buys a gig in your site, you will want your website to record this event, and show the shopped item in the user dashboard. Stripe uses the webhook system, to always call the set URL from your site when an event happens.
2. How does a webhook work ?
A website owner would set up a webhook in Stripe for several key reasons, all of which revolve around automating and enhancing the functionality of their online business operations. Webhooks in Stripe are essentially automated messages sent from Stripe to the website when specific events happen in a Stripe account. These messages are in JSON format and are sent to a specified endpoint on the website, allowing the site to listen for and react to these events in real time. Here are some of the main reasons for setting up a webhook:
- Real-time Event Processing: Webhooks provide immediate information about events, such as successful payments, subscription changes, or charge disputes. This allows the website to update user accounts, access levels, or order statuses automatically without manual intervention.
- Automating Workflows: They help in automating workflows like emailing customers payment receipts, renewing subscriptions, or triggering specific actions in response to payment failures. This automation enhances efficiency and reduces the need for manual oversight of each transaction.
- Enhancing Security: Webhooks can be used to verify the integrity of transactions. For example, by listening for a successful payment event before granting access to a paid resource, you ensure that the resource is only available to users who have paid.
- Custom Notifications: They enable customized notifications for various events, allowing the website to inform customers or team members about specific actions, such as refunds, chargebacks, or subscription updates, enhancing communication and transparency.
- Data Synchronization: Webhooks ensure that the website’s database remains in sync with Stripe’s data. For instance, if a customer updates their payment method directly in the Stripe customer portal, a webhook can notify the website of this change, allowing the site to update its records accordingly.
- Error Handling and Monitoring: By monitoring webhook events, a website can track errors or failed transactions and react accordingly, such as by alerting an administrator or automatically attempting to resolve issues.
- Integrating with Other Services: Webhooks can be used to connect Stripe events with other tools and services used by the business, such as accounting software, customer relationship management (CRM) systems, or marketing platforms, creating a more integrated and automated ecosystem.
In summary, setting up a webhook in Stripe allows website owners to create more dynamic, responsive, and automated processes, enhancing the overall efficiency of their online operations and improving the user experience for their customers.
1. Why do I need a webhook
You need a webhook because your website needs to know when a payment is done, and more important, when is successful. That way the shopped item will show in the user dashboard in your website. Failure in not setting up correctly, or not setting up at all, the webhook, will lead to your site not recording any purchase, which will make your customers angry. Setting up the webhook is a very important step when setting up the stripe payment gateway.
2. How do i setup the webhook ?
First of all, you need to install the stripe payment gateway plugin/extension from our website. You will get this if you purchase the pro version of our micro jobs theme.
After installing the stripe gateway, you will see something like this in your website admin:
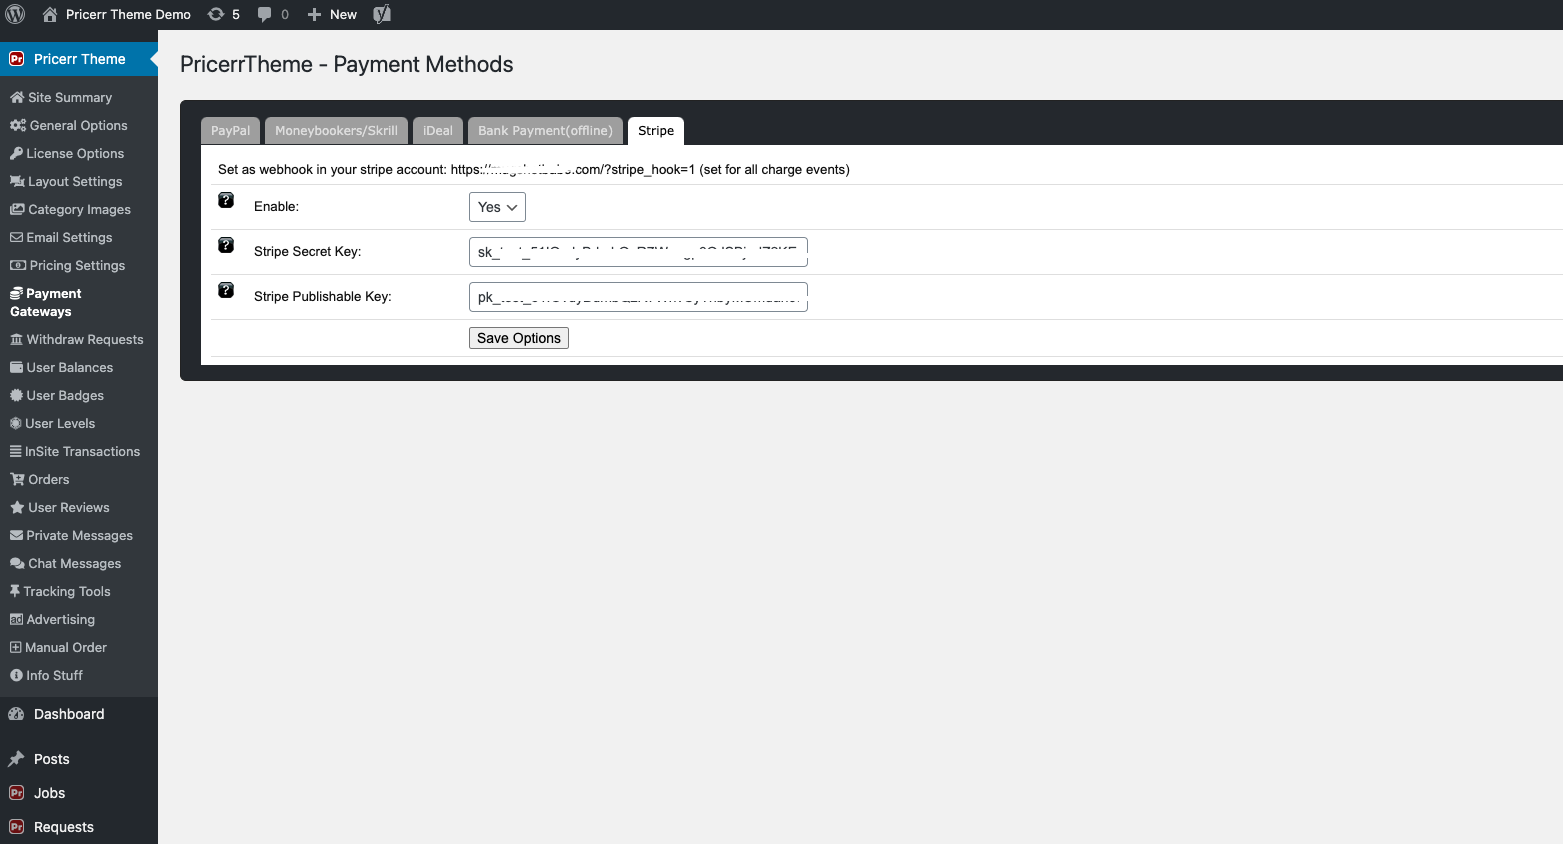
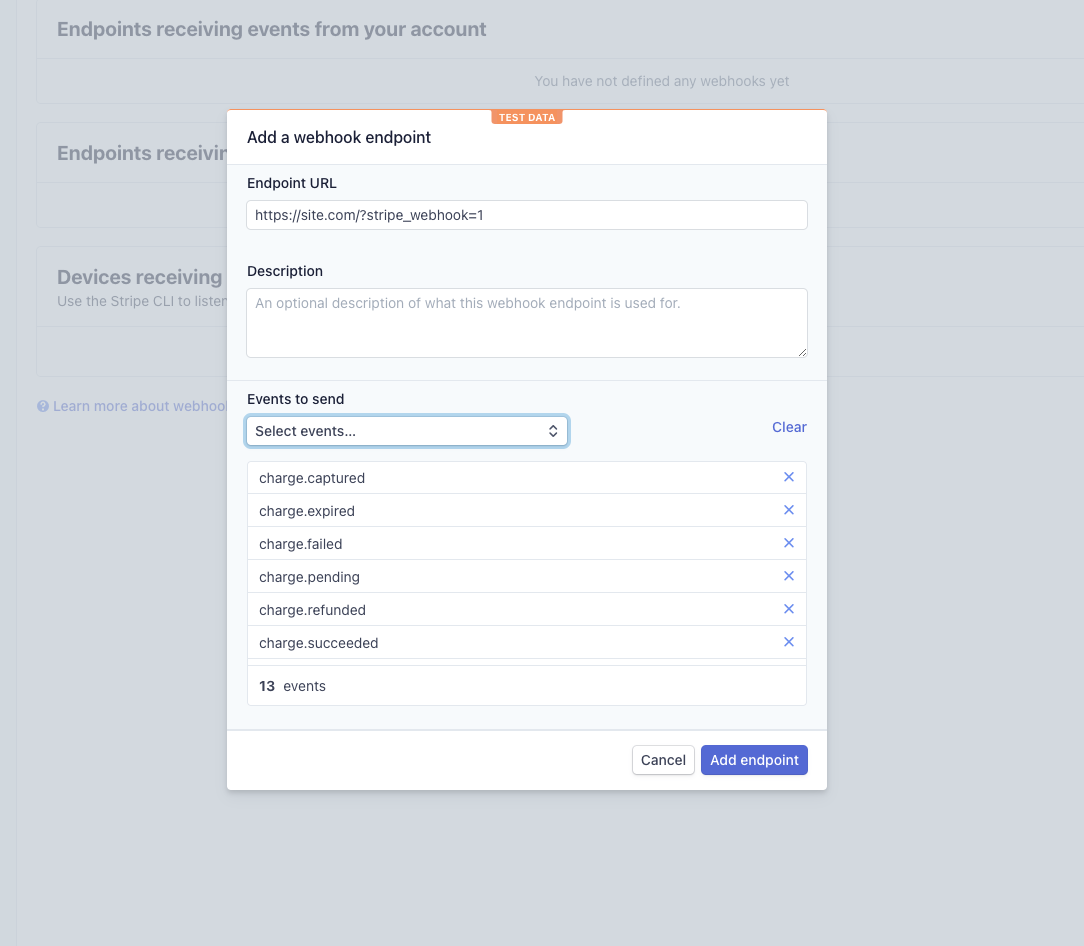
After that, copy the webhook url shown in that screen and add to your stripe account. Make sure you add for live account (or add for test account if you want to use that first).

If you have issues with setting up stripe in your WordPress microjobs theme, we do offer WordPress web development services for any WordPress type of site. So why not get in touch with us ? Because we have over 12 years of experience. Or if you need affordable web design services in general, we can also do anything other than WP.